Speck-electronics EQ16 Manuel d'utilisateur
Naviguer en ligne ou télécharger Manuel d'utilisateur pour Audio Speck-electronics EQ16. Speck Electronics EQ16 User Manual Manuel d'utilisatio
- Page / 33
- Table des matières
- MARQUE LIVRES
- MODEL EQ16 1
- Warranty 2
- Edition 2
- Contents 3
- Chapter 4 Operation 4
- Chapter 5 Wiring and Other 4
- Introduction 5
- Figure 1b. Rear Panel Layout 6
- General Description 7
- Standard Accessories 7
- CAUTION! 8
- IMPORTANT! 8
- Rack mount adapters 8
- Initial Preparation 9
- Repacking For 10
- Shipment 10
- Installation 11
- Mounting location 12
- Configuring the AC 12
- Connecting the 13
- Power Supply 13
- Default Control 14
- Settings 14
- Rack Mount Adapters 14
- Interfacing the Model 15
- EQ16 Equalizer 15
- Cleaning 15
- Model EQ16 to a Mixer 16
- Interface to 18
- Operation 21
- FRONT PANEL CONTROLS 22
- Figure 10. Equalizer Channel 23
- REAR PANEL 27
- Headroom and 28
- Boost/Cut 28
- Wiring and Other 30
- Connectors 31
- Proper AC Grounding 31
- Proper Audio 32
- Grounding 32
- EMI and RFI 33
Résumé du contenu
MODEL EQ16 16 CHANNEL - 3 BAND PARAMETRIC EQUALIZER Model EQ16-16 Model EQ16-32 Reference Manual speckelectronics
Merely affixing the Model EQ16 into an equipment rack is no guarantee that the product is making a reliable ground connection. The mounting rails in
7 The following information should give you the basics on how to install the Model EQ16 and Power Supply. The proper installation of the Model EQ
The PS3 offers a variety of mounting options. The power supply may be placed on any flat surface, permanently affixed to a flat surface, or mounted o
There are 5 terminals available on the power transformer of the power supply. The configuration of the five terminals determine the operating voltage
Next, fit the square plug into the connector at the rear of the Model EQ16. These connectors are also keyed to fit in only one direction. Once the p
Interfacing the Model EQ16 Equalizer To clean the front or rear panel, wipe the surface gently using a soft lint-free cloth to avoid scratching the pa
Due to the flexibility of the Model EQ16, there are many places it may be interfaced - too many to enumerate in the manual. A basic rule to follow wh
A few of the larger recording consoles that lack a patchbay may use two jacks for the channel's insert points; one jack for insert output, and an
There are no special requirements for installation and interface of the EQ16 to the Xtramix except to use reasonable care in the layout of the audio w
15 Figure 6. Speck Xtramix - Application #1 Chapter 3 Installation Section
Speck Electronics makes no warranty of any kind with regard to this material, including, but not limited to, the implied warranties of merchantability
16 Figure 7. Speck Xtramix - Application #2 Chapter 3 Installation Section
17 We hope to give you basic information on the operation of the Model EQ16 and adequately describe its controls, switches, and connectors.
The Model EQ16 utilizes 2 of the previously mentioned parametric controls; the frequency select control and boost/cut control. These controls are equ
19 Figure 10. Equalizer Channel Chapter 4 Operation Section
Bandwidth (Q) The bandwidth of the selected frequency is automatically adjusted with the selection of the frequency sweep control. The lowest setting
3. Mid boost/cut 6. Low frequency sweep 4. Mid frequency sweep 5. Low boost/cut As long as you don't dramatically change the sound of the low fr
22 Figure 11. Equalizer Rear Panel Chapter 4 Operation Section
The Model EQ16 is available in two versions: The EQ16-16; 16 mono channels, and the EQ16-32; 16 stereo channels Each channel of the EQ16-16 has two j
When using the EQ16 it is important to understand the relationship between the maximum input level, the maximum output level, and the boost/cut contr
If the headroom is exceeded, it will be necessary to either reduce the amount of "boost" and/or reduce the input level. Reducing the level
iii General ... Operator Safety Summary ...
26 It is assumed that in addition to the Model EQ16, a considerable investment has been made in electronic equipment such as a mixer, synthesizer
All wire and cable interfaced to the EQ16 and Speck products should be terminated with high quality connectors. A 1/4" plug or XL connector shou
Clock noise is one of the greatest enemies of the audio racks AC system. If a synth or any microprocessor based device emits or somehow couples its c
If a patchbay is utilized in your mixing system, the rules for shielding change. With a patchbay, normally all shields are connected at the patchbay
Installation ... Default Control Settings ...
1 Thank you for purchasing our Model EQ16 Sixteen Channel Equalizer. This manual covers the operation of the Model EQ16-16 and Model EQ16-32.
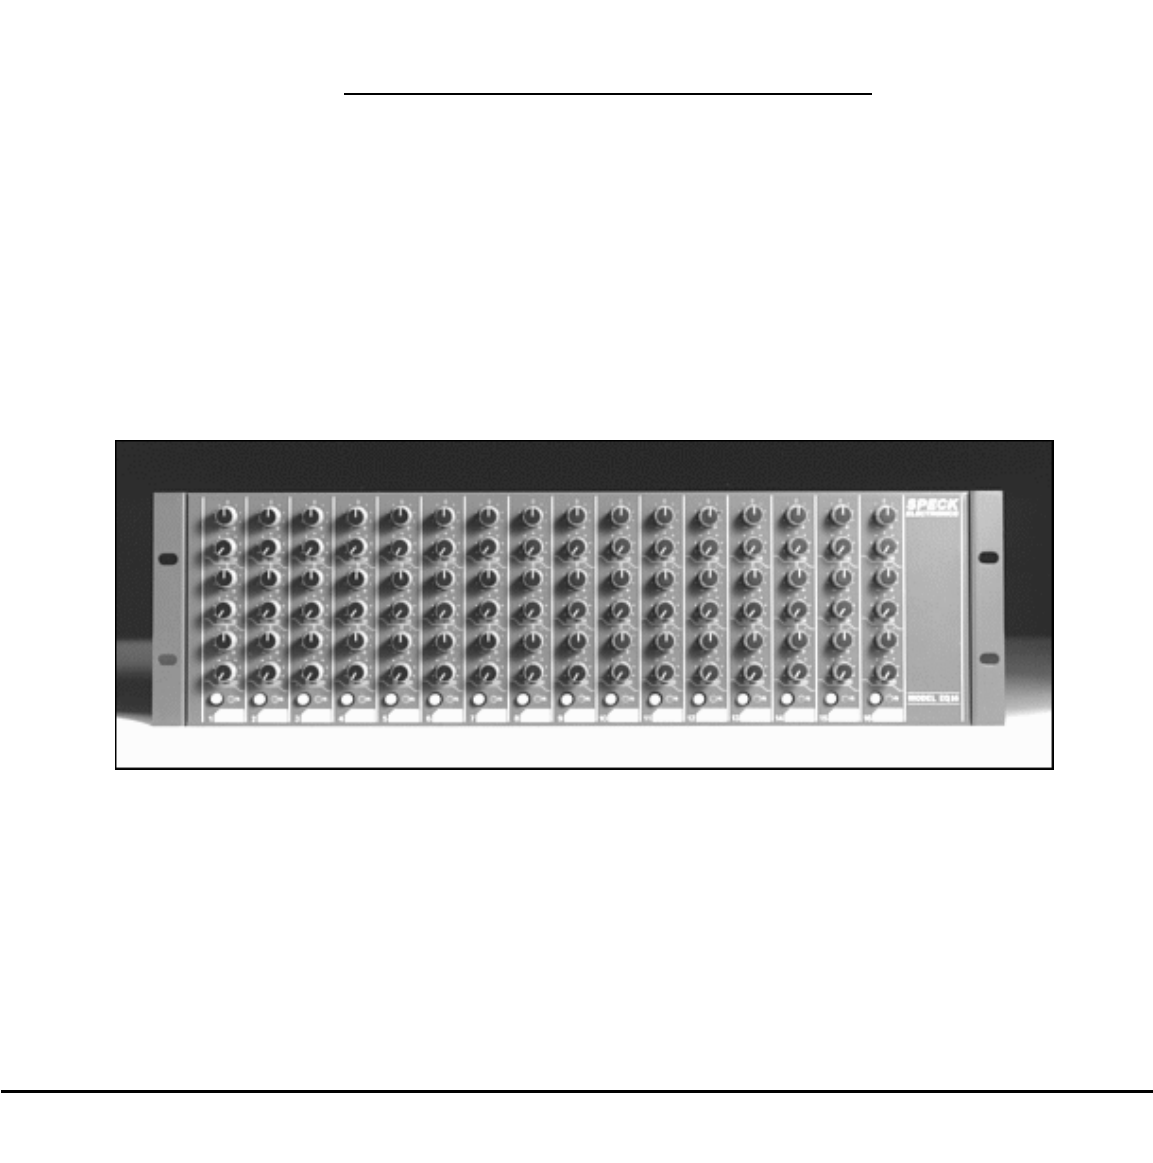
Figure 1b. Rear Panel Layout 2 Figure 1a. Front Panel Layout Chapter 1 Introduction Section
To avoid personal injury, do not remove the top cover from the power supply, or the rear panel of the Model EQ16 and never operate the external power
The Model EQ16 is supplied with a set of rack mount adapters. If the intention is to mount the EQ16 in a standard 19"
5 The Model EQ16 is delivered in a special, protective container and was carefully inspected both mechanically and electrically before shipment.
© 2020, manymanuals.fr. Tous droits réservés | 0.690 s |
 Manymanuals.com
 Manymanuals.de
 Manymanuals.fr
 Manymanuals.it
 Manymanuals.pl
 Manymanuals.cz
 Manymanuals.es
 Manymanuals-pt.com
Commentaires sur ces manuels